...Return To Mine & Other Bonneville Car Construction Pages
.Previous Page...............B'ville Car Index Page.........................Next Page
..................Front Suspension Lever Arms -- Part II
.................... .
.
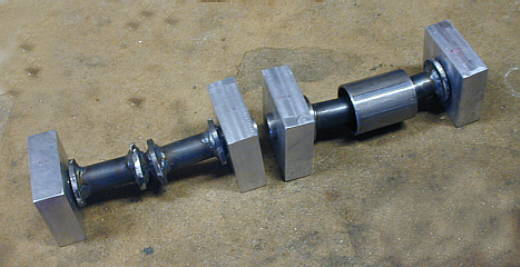
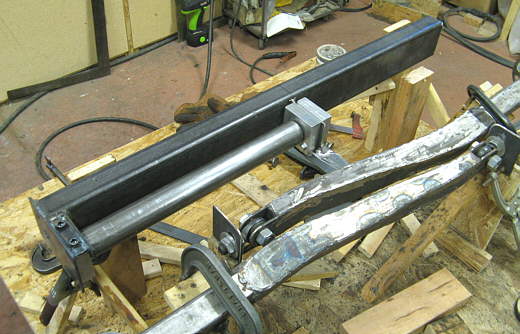
We left off with the 4 bearing blocks and the 4 bearing shaft assemblies. I have a short piece of tubing on the right side to represent the tube that will be on both sides of the front.
................... .
.
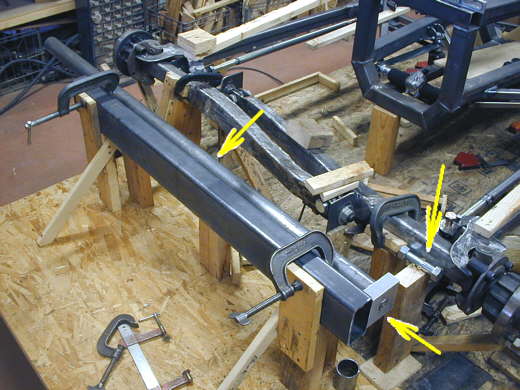
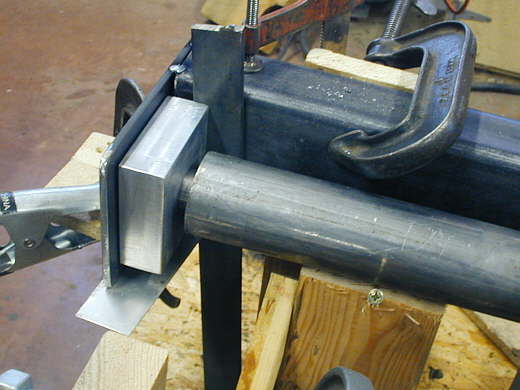
A 2 X 4 piece of rectangular tubing has been blocked into place. This will be the front crossmember and will support the bearing blocks (bottom right arrow) and the front of the car. Here I have one long piece of tubing (top left arrow) that will be cut to make two pieces for the independent suspension for both wheels. There is a bolt blocked into place (top right arrow) that the lever arm that will go to the tube will rotate on as the axle goes up and down.
................... .
.
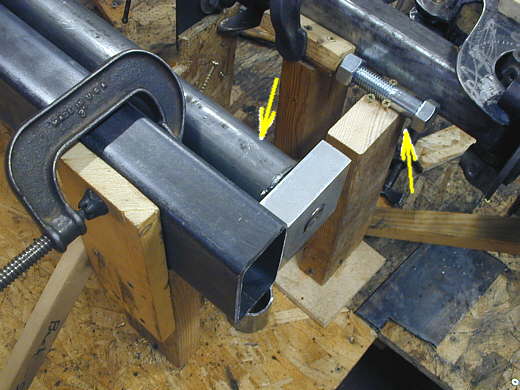
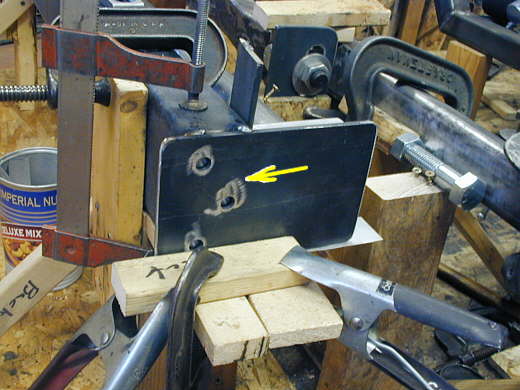
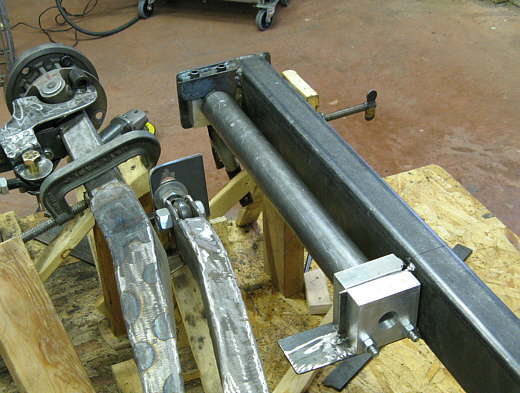
This is a close-up of that area showing where I will weld a lever arm to the tube (left arrow) that will ride on the bolt attached to the axle (right arrow). Then there will be an inboard lever arm on the tube that will have the front spring and shock attached to it.
................... ....................
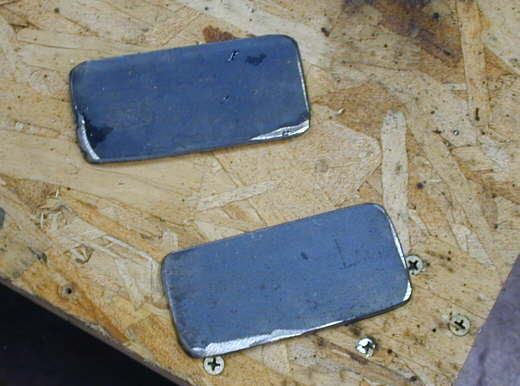
2 X 4 plates were made to weld into both ends of the rectangular tubing to reinforce it in that area and to strengthen another plate that will be shown a couple pictures down.
...................
Here one of the plates in the previous picture has been welded into place.
...................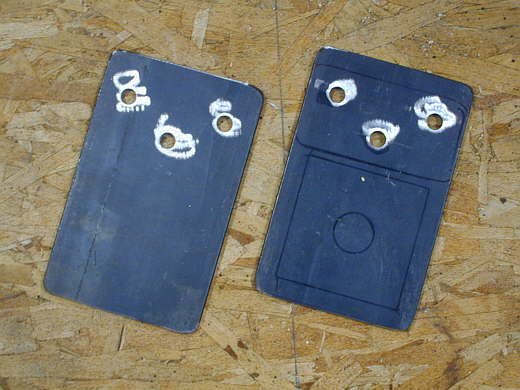
These plates will be the main plates that will hold the outer aluminum bearings to the crossmember. The holes will allow me to plug weld these to the plates in the previous picture. You can also see where I drew where the bearing block will locate.
...................
The end supports were then blocked into position and plug welded to the plates in the end of the rectangular tubing and also were welded all the way around the tube.
...................
Another view of the end supports tacked into place for final welding.
........................
I cut some clearance bevels on the bearing blocks to clear the welds.
....................
Besides the end plate there is a top plate and an inside plate that will locate the bearing block to the crossmember. I drilled and tapped the bearing block to accept these two allen screws that will hold it in place. I next welded the strap the screws go through to both vertical supports.
....................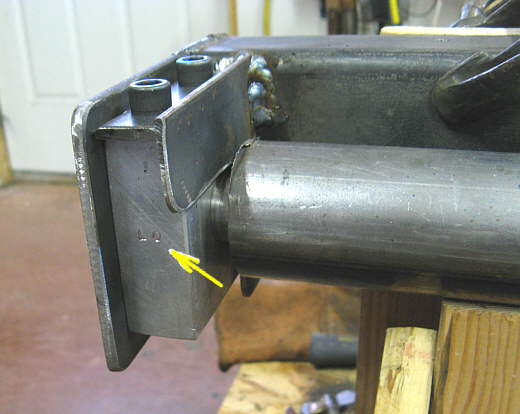
This shows the inside support and how the three plates capture the bearing block. The forces from the bearing block will be in an upward direction as the forces from the cars weight transferred to the front crossmember will be downward on the bearing block. I marked (arrow) the bearing blocks so that they would always go back to the same position. This one is L.O. (left outer).
.....................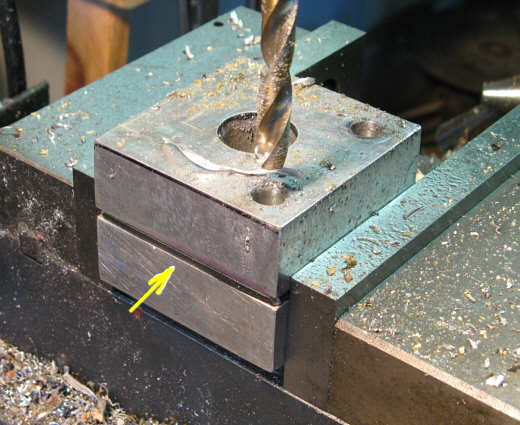
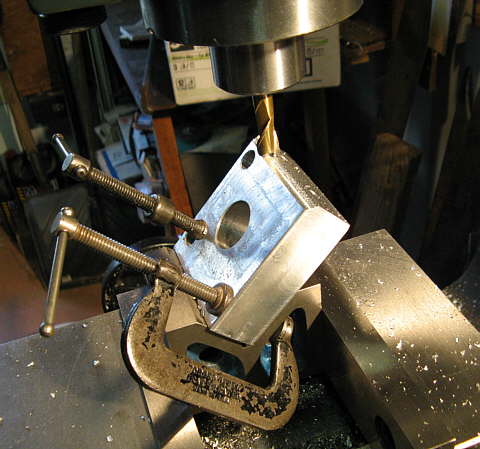
The two inner bearing blocks are located a little different with two horizontal bolts that go through a vertical locator piece. Here I'm drilling the two holes through the two bearing blocks and the locator piece (arrow) all at the same time.
.................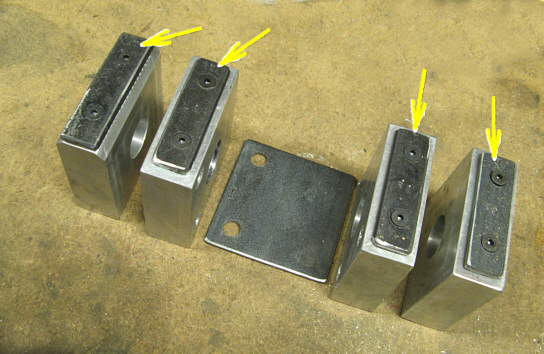
I also drilled and tapped holes for spacer plates (4 arrows) that attached to the backs of the 4 bearing blocks. In the picture the backsides or faced upwards. You can also see the locator plate for the center bearings. The spacer plates at this stage serve no purpose, but move the bearing out a little from the crossmember and give me a place that I could always add another locator or brace of something if I needed to.
....................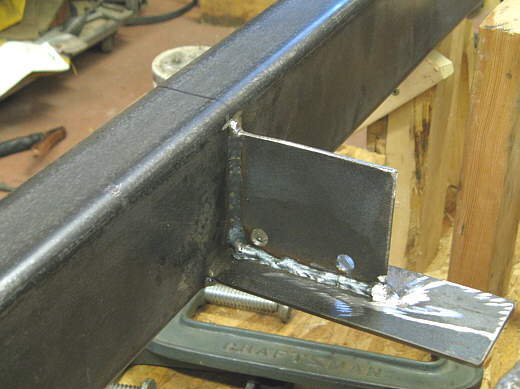
Here the locator piece is welded to the crossmember and to a shelf that the bearing sets on. When finished these two pieces will just locate the bearing and not support it, so there will be no forces on these two pieces.
....................
Later a support piece will be made that will transfer the forces from the crossmember to the center bearings that will be on the top side of them.
....................
So one lever arm tube and bearings are in place. Next I did the other side. You can see the bolts that just locate the center bearings from moving fore and aft.
..................................................................Next
Page